foundation fabric + lakeside pajamas

foundation_blog_tour

I remember meeting Shayla Wolf (of Sassafras Lane Designs) years ago at Quilt Market, when I worked at Dear Stella. When we finally met in person, I immediately realized 1) she is a kindred spirit and 2) she undoubtedly loves color.

Fast-forward five years later, and Shayla’s first fabric collection is about to hit shops! True to form, she’s created a group of designs in a range of colors spanning the rainbow. Foundation is made up of hand-drawn motifs from Shayla’s sketchbook, with a nod to her background in architecture studies. Most of the collection features rich, saturated ground colors that will brighten up any fabric stash, but she made sure to include neutral and low-volume options as well.

lakesidepajamas2

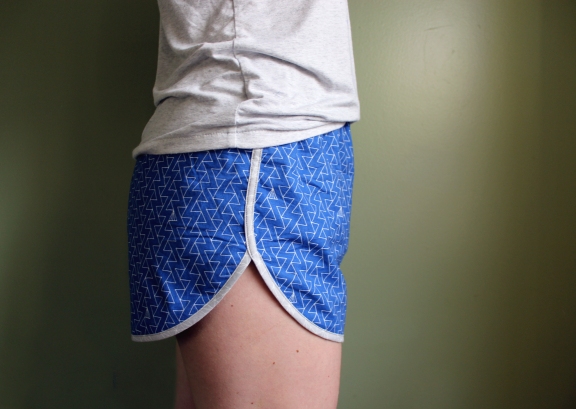
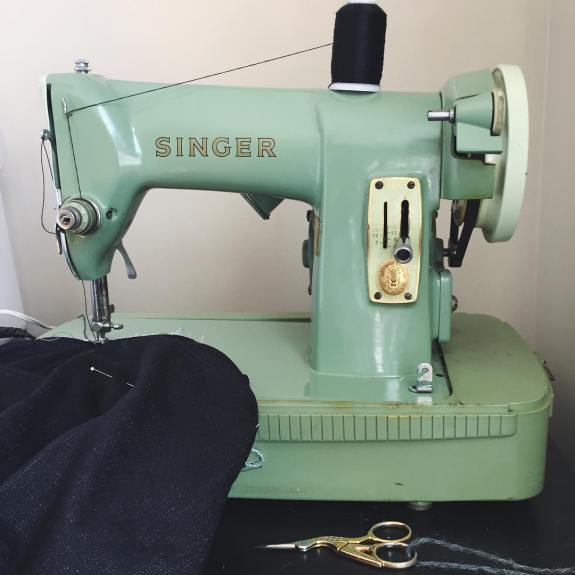
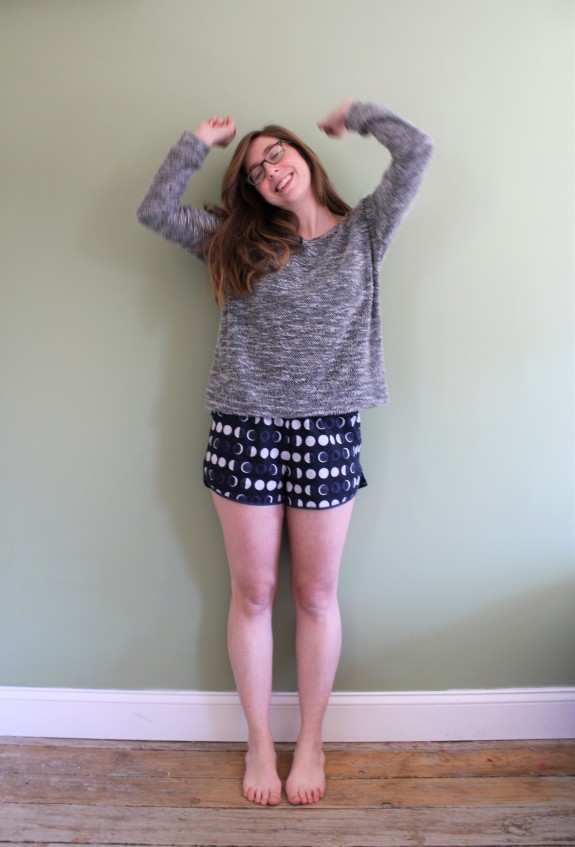
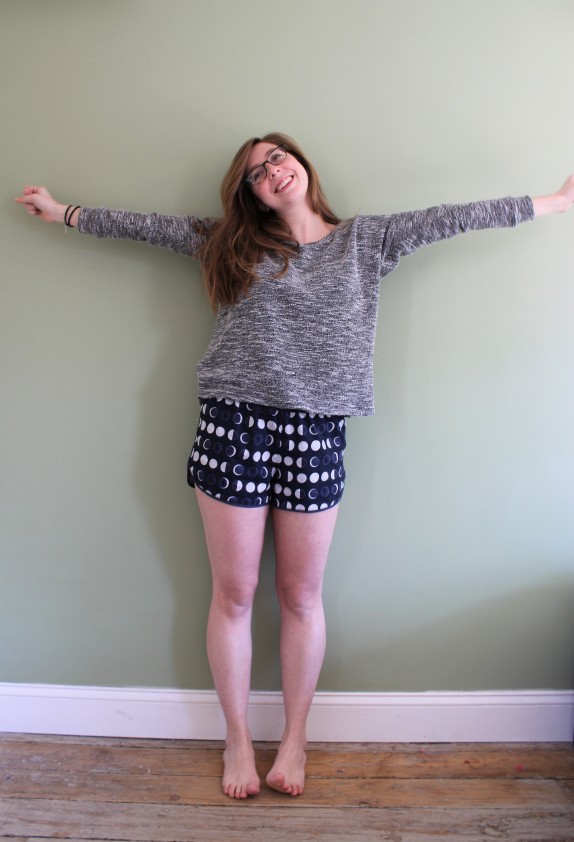
I do dabble in quilting from time to time, but for this blog tour I wanted to stick to my favorite kind of sewing – garments for meeee. I don’t often use quilting cotton in my garment sewing anymore, but I do love using fun prints to make pajama bottoms. It’s important to me that I make things that I will actually use, and I definitely use pajama bottoms. The pattern I’ve been using over and over (for years!) is the Lakeside Pajamas by Grainline Studio, so as soon as I received my yardage of Foundation I knew that was the project I’d make.

lakesidepajamas3

I’ve made these pajama shorts a few times now, but I perfected them this time around. First, I added 1″ in length. I like the super-short length for sleeping, but I wanted to add some length for when I’m running errands around the neighborhood. Also, the last time I made these I somehow made the bias binding too narrow. It wasn’t a huge deal but I prefer the look of slightly thicker bias tape, so I made sure to cut mine 1.25″ wide. I know some people don’t like sewing bias binding but I loooove it. And not to ~brag~ but I’m really happy with how neatly mine came out this time.

lakesidepajamas10

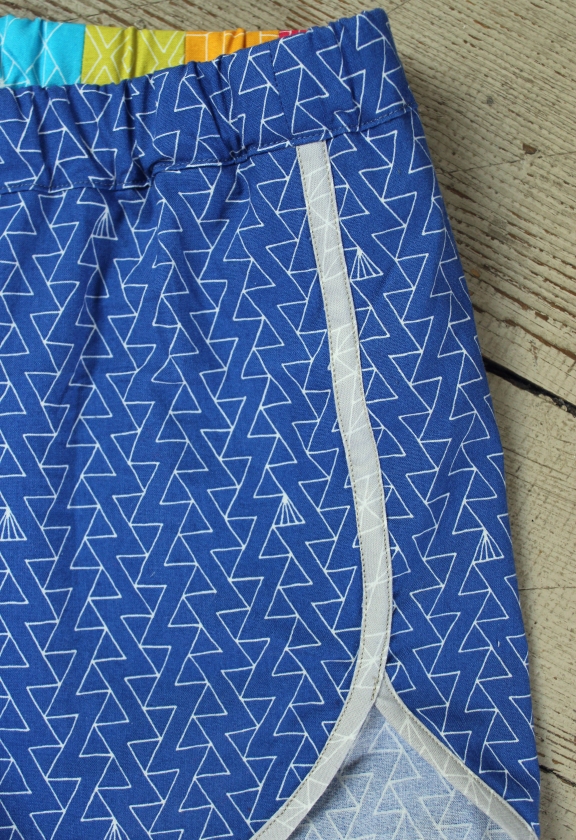
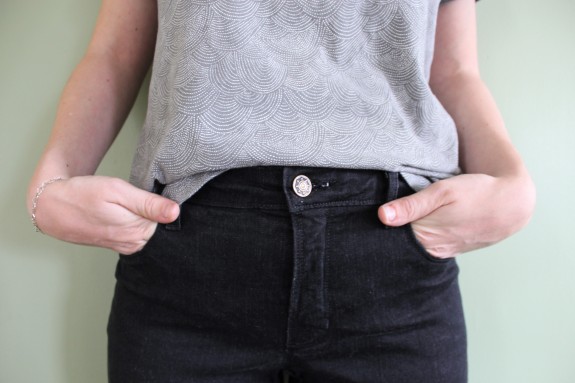
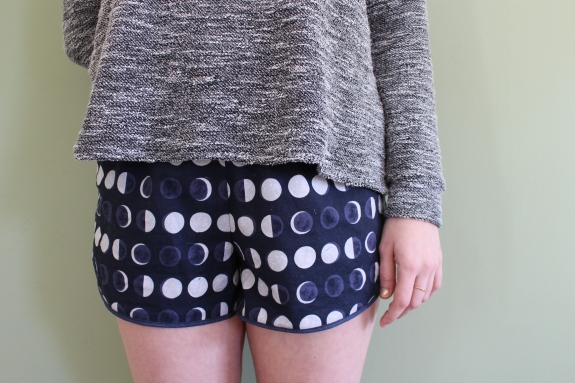
I used 43352-4 for the shorts, a rich true blue color with fine white triangle motifs, and 43358-21 for the bias binding. The shade of grey is really lovely and I will definitely be using it here and there in other projects.

lakesidepajamas4

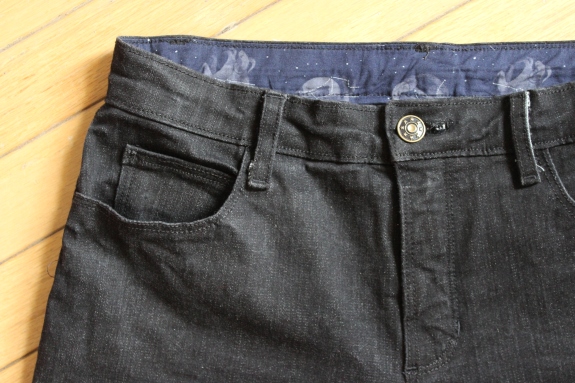
When I was sewing these up I knew I had to give a little nod to my rainbow-loving friend, Shay. I used a charm pack she sent me and chose four colors to piece together into the waistband – I think each section is 1.5″ wide. I love how the color peeks out : )

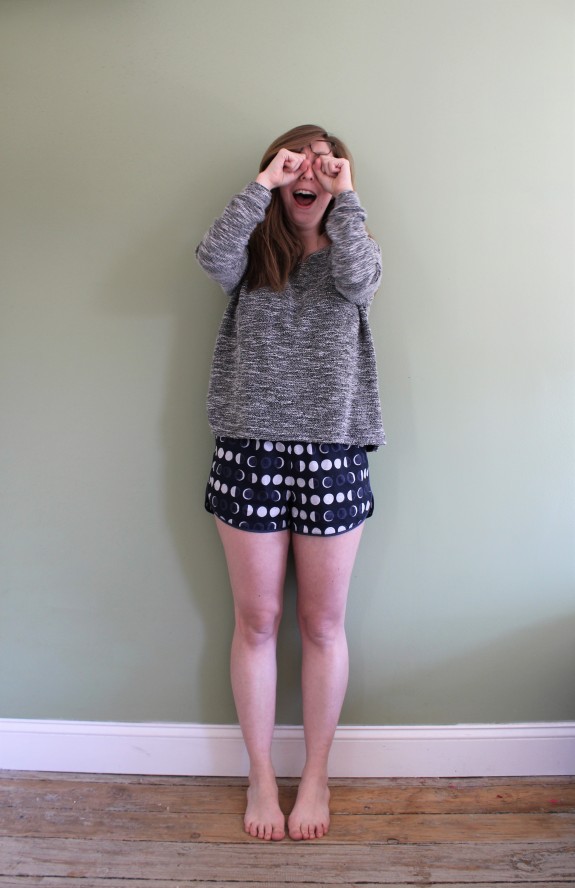
Side note – I slept in these the night before we took photos. I had to test them out… for science. I’m happy to report these get a 10/10.

lakesidepajamas11

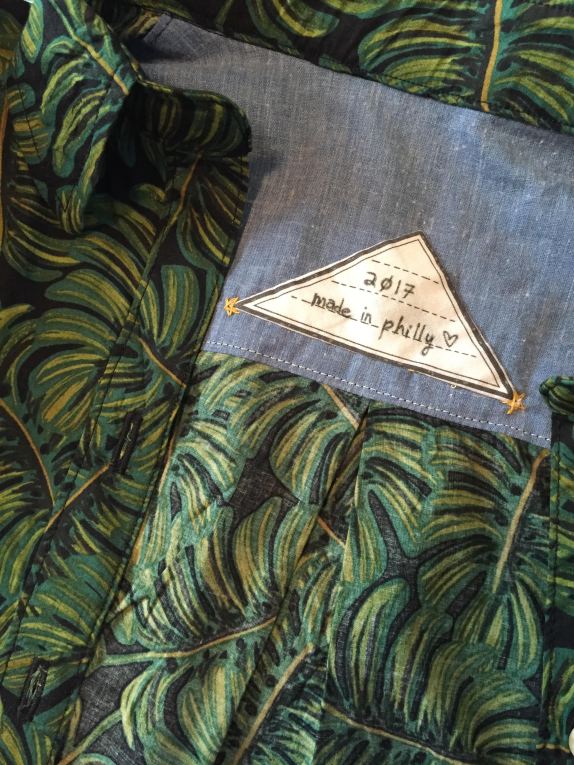
Here’s one more pic of the inside of the waistband. I used the selvage as an inside tag – it makes me so happy to see that little detail!

lakesidepajamas8

Shayla wrote all about her experience designing this collection in her kick-off blog post. I loved reading about her process and the excitement that went into creating it, and all of the projects in her Lookbook are so well done. Shayla is an amazingly talented maker, and I’m so looking forward to watching her continue to create.

I’m excited to see what you guys make with Foundation! Want to see what other peeps are making? Follow along on the Foundation blog tour:

Foundation-Blog-tour2

Schedule:

Tuesday, February 6th: Shayla Wolf | Sassafras Lane Designs

Wednesday, February 7th: Giuseppe Ribaudo | Giucy Giuce

Thursday, February 8th: Tara Curtis | Wefty Needle

Friday, February 9th: Nichole Vogelsinger | Wild Boho

Saturday, February 10th: Robin Long | Robin Ruth Design

Sunday, February 11th: Jessie Stern | Jessie Stern Sews (me!)

Monday, February 12th: Jessica VanDenburgh | Sew Many Creations

Tuesday, February 13th: Kristy Wolf | Wolf Creek Quilting

Wednesday, February 14th: Sarah Sharp | No Hats in the House

Thursday, February 15th: Nicole Daksiewicz | Modern Handcraft

Friday, February 16th: Elise Baek | Elise & Emelie

Saturday, February 17th: Kaitlyn Howell | Knot and Thread Design

Sunday, February 18th: Sarah Thomas | Sariditty

Monday, February 19th: Jo Westfoot | The Crafty Nomad

Tuesday, February 20th: Shayla Wolf | Recap

mccall’s 7547 (overalls!)

1

This was definitely not intentional, but somehow I’ve managed to save my favorite project of the year for my last post of 2017! I made these overalls at the very end of October and have worn them at least once a week since then. I chose this project more as an experiment, but I’m pleasantly surprised at their wearability, even into winter!

2

I’ve had my eye on a bunch of overalls/dungarees patterns for a couple years at this point, but hadn’t bit the bullet until I found M7547. Of the Big Four patterns, I think McCall’s does a really great job of coming out with styles that mimic what I’m seeing in RTW, without being too out-there or too homemade-looking. I think a big part of choosing patterns from them, though, is having the ability to look past the cover (something I talked about with Andrea at our Sewing Sewcial earlier this month).

In McCall’s I’m a straight size 10, but I sized up to a 12 after checking the Finished Garment Measurements and realizing my fabric didn’t have any stretch – it’s just a black twill I picked up in the Garment District last year. I was worried it might be too lightweight so I was planning on this being a muslin, but the fabric ended up working out really well. If I make overalls again I might use a fabric with stretch, but I don’t think it’s necessary.

3

Making these was SO fun. I loooove the front pocket shape, especially with the topstitching. I inserted a lapped zipper on the side as instructed, and I think the metal zipper makes it look a lot more professional. I topstitched pretty much everywhere I could, which is my fave.

4

The only major pattern adjustment I made was the leg width. The pattern has pieces for flared or ‘skinny’ pants, but the slimmer option was still wider than I wanted. I think they would work if the waistband was a bit more relaxed in fit (mine sits right on my waist, which I like), but the looser pants were looking strange on me.

5

Other than slimming the leg width, I didn’t make any major changes! This pattern fit me really well right out of the package. The straps were just barely long enough, so I’d maybe lengthen them an inch or two just to have some wiggle room in the future, but they worked perfectly fine here.

6

I thought I’d have a harder time finding shirts to wear with these, but it turns out I have plenty! In caaase you’re wondering about that too, I usually will wear a Linden Sweatshirt, Lou Box Top, or Kalle Shirt. Those also happen to be three of my most-made patterns, ha!

7

Speaking of the Kalle Shirt, this is my most recent version! I used an April Rhodes rayon that I snagged a couple months ago, and I love how this guy turned out so much. The Art Gallery rayon is a little more lightweight than the Cotton + Steel rayon, which at first was a bit of a turn-off (especially since it was frustrating to cut). But I’m really happy with how this shirt came out! The only change I made was to simply hem the sleeves, instead of using the hem band – a ~design choice~ I made out of sheer laziness.

8

Whew! Considering that I never thought I’d wear (or make) overalls, I am so proud of these. I think that making my own clothes has made me more adventurous style-wise. Even if the project turns out to be a fail, you still exercised your brain and got a few hours of that lovely sewing machine hum : )

10

vogue + new look wrap dress mash-up!

IMG_9844

I missed this rayon when it was on Blackbird Fabrics the first time around, so I was super excited when she got some more in stock earlier this summer. I love this mustard color so much, and the black/white floral motifs perfectly keep the print from becoming too loud to wear. I had/have a ton of weddings this year, so I didn’t wait too long before cutting into my yardage to make a dress!

IMG_9888

A couple months ago I used New Look 6493 to make a jumpsuit (hopefully will be blogged soon!) and after some tweaking I came to love the bodice’s fit. I have a few sleeved wrap dress bodices that I really like, but it’s nice to have a strappy version where I can dance a little more ~freely~ at weddings. The style lines are also a little different – there are princess seams instead of darts, and I think they’re a nice change!

IMG_9889

Though the New Look pattern isn’t written to make the bodice a true wrap, it’s really easy to modify – I like to keep a small gap in the side-seam to feed the tie through. For the skirt, I used the bottom of Vogue 9251 since the curved hem is so lovely, but I think I prefer the skirt from McCall’s 7246… it’s just a liiiittle swing-ier.

IMG_9870

One more thing to note is that I don’t typically use the waist ties that come with the wrap dress patterns I own. I like long, skinny straps that I can tie in the front, and then I let them hang down. I usually just eyeball the length when I’m cutting the pattern pieces, erring on the side of making the ties longer (and then shortening them later).

Aaand that’s it! I wore this dress to a wedding in September and it was definitely fun to boogie in. Here’s hoping I can transition it into autumn : )

Processed with VSCO with f2 preset

ginger jeans + kalle shirt + janome MC6700P review

8

Hiiii! I have a lot sewing to share in the upcoming weeks, but first up are these new jeans and button-up! After taking these photos I realized both patterns are from Closet Case Patterns, and I’ve made each of them several times before. If anything, this is a testament to just how effortlessly these patterns fit into my wardrobe (and, how I’m nothing if not consistent).

Also! I made both of these using the brand new Janome Memory Craft 6700P.  I’ve been sewing on a pretty standard Janome 8077 for the last few years, and I love it so much and use it so often, it sometimes feels like it’s become an extension of my body… like my third arm or something, is that weird? When Janome contacted me to try out and review this machine, I was super interested since I’ve been sewing with them for years, and I’ve never really sewn consistently on a ~fancier~ machine.

10

Let me first say that, holy heck, the machine is big and heavy. I bike to work and don’t have a car, so I had to finagle a way to get the machine home when it arrived. Once that journey was over, I was so pumped to start makin’ things! Though I only had it for a short time, I tested it out on a ton of projects.

2

Let’s chat about these first projects. On top is the Kalle Shirtdress using the new Rifle Paper Co Monstera print in rayon/lawn. First off, this substrate is NICE. I think I would still prefer 100% rayon for a drapey dress or skirt, but for a button-up the rayon/lawn combo is extremely ideal. I’ve been reaching for this shirt way more than I even mean to – the light weight makes it very comfortable and it’s crisp without being too stiff. I also love the print, but there’s something about the fabric that makes this shirt so dang delightful.

6

At this point I’ve made the Kalle Shirtdress a lot of times (one dress and two shirts, here’s one I blogged) and the only thing I’ve been changing is the hem length. Both the tunic and cropped lengths feel a little awkward on my frame, so I’ve been playing with the hem whenever I make this pattern. My hem curve is also not as deep as the drafted pattern, which is just a personal preference. I used flat-felled seams along the sides, which I looOoOove, and included a cute little label on the inside using one of Rae Ritchie’s labels for Dear Stella. Side note, I saw Rae last weekend in Minnesota (I was there for a friend’s wedding) and SHE IS MY FAVORITE.

5

Now for the jeans! I’ve made two pairs of Ginger Jeans so far, and this was the first time I used Cone Mills Denim. There’s a ton of blog posts out there about this denim, and peeps tend to gush about it. I thought it was great to work with, though honestly not that different from other stretch denim I’ve used for jeans. My 10oz Turkish black denim was awesome, and the random cut I bought in the Garment District for my first pair was great too. Right now the jeans feel very new, so I think I’m most excited to see how this denim breaks in over time. Ooh, and these are the 12oz S-Gene in Indigo! I bought it during a sale online at Threadbare Fabrics (also where I got my Turkish denim).

1a

Making a pair of Ginger Jeans was what I really wanted to do to test the Janome. My current machine works well with denim, but sometimes it has a hard time when there’s a lot of fabric layers. The MC6700P really did sew beautifully, and noticeably quietly as well. I loved the automatic thread cutter, which definitely felt a little extravagant at first… but then I got very used to it. The work space is larger than my current set-up (10″!), and I loved having the extra room.  I will also mention that the quick set bobbin is awesome too – there’s a contraption down there so you don’t have to pull the bobbin thread up, you just start sewing. There were a ton of little details like these that made sewing a little breezier overall.

7

I also played around with some of the built-in fonts! This was really exciting because my current machine doesn’t have that feature. I was particularly pumped about the “handmade” font setting, and I ended up stitching it onto the waistband of my jeans. It makes me so ridiculously happy to see! Especially since it’s covered up by my belt, it’s a fun secret detail.

As far as fit, the crotch length/depth feels right – the only thing bothering me are the wrinkles at my knees. I recently bought Fit for Real People and Pants for Real People (both of which have amazingly 90’s photos that you should check out if you haven’t), so I’m going to do some research about that. Overall, this pattern works well for me straight out of the envelope, and you can see some more notes I’ve made here and here.

Whoooo, okay that was a lot. Here I am on Saturday morning, feeling sad about sending the machine back to Janome! I have more projects to share that I made on this pup, so check back soon for that : )

sending_janome_home

Oh, and big thank youuuu to my main squeeze for taking these photos of my butt for me (Dan, u da best). Byeeeeee.

11

rifle paper co // mccall’s 7246

m7246_1
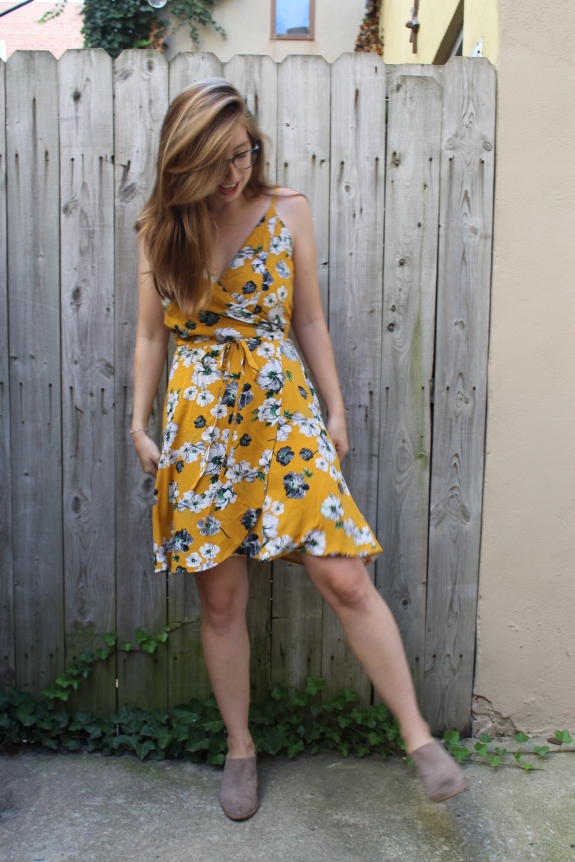
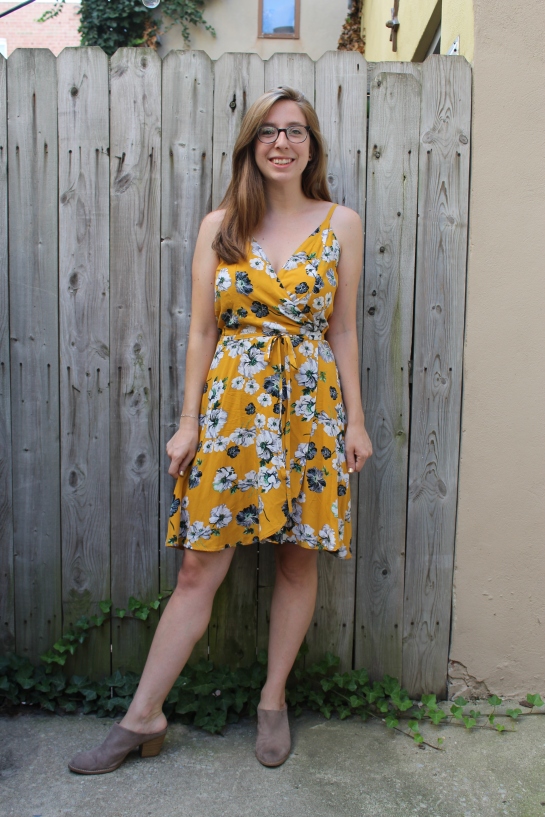
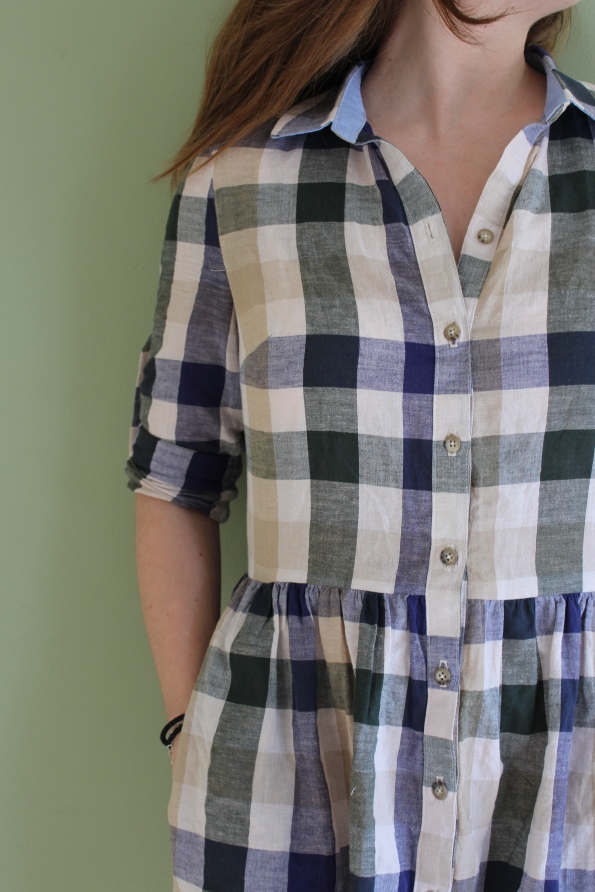
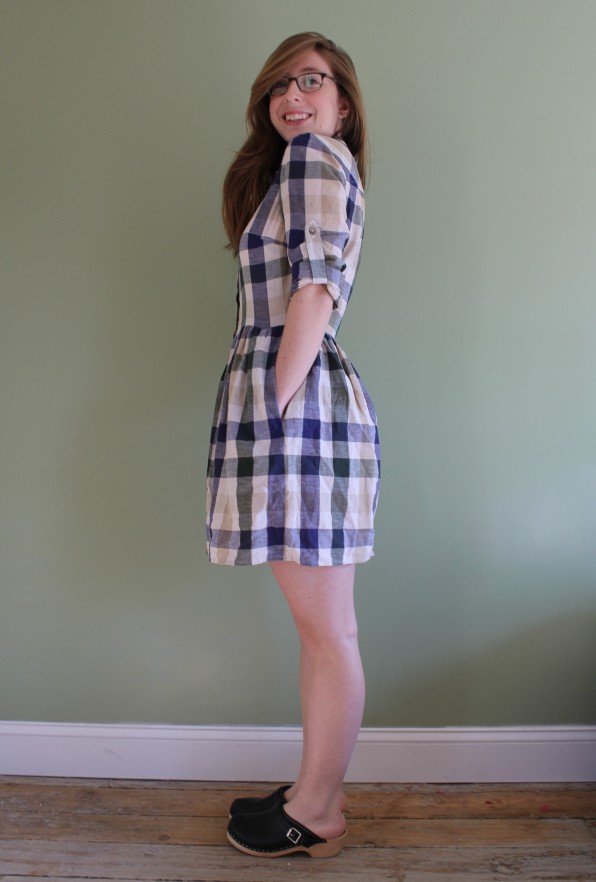
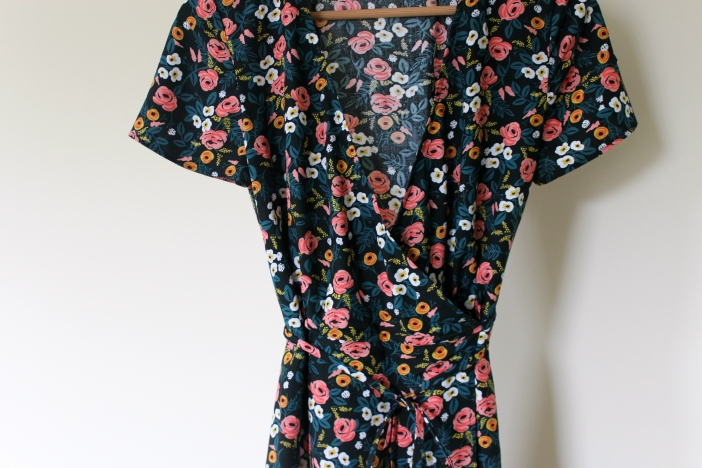
As is usually the case for me, I’ve been ruminating on a specific woven wrap dress pattern for at least a year – McCall’s 7246 by Melissa Watson – mostly because I wanted to make an iteration of this dress from Reformation. M7246 never seemed quite right, and it took me a while to parse out exactly what I loved about the inspiration dress and the changes I’d have to make to my pattern.

reformation_dime_dress

I did make a muslin last weekend, using a ton of mismatched scraps from past projects, and I sort of wish I took a photo of the dress because it looked like a straight up clown costume. It definitely helped me figure out my game-plan though, and I learned that my usual McCall’s size (10) fit perfectly. The main changes I decided on were adding a ruffle, removing length, and adding some swoosh (technical term) to the skirt; narrowing and lengthening the waist ties; and adding some fullness to the sleeves.

m7246_15

After making my muslin, I made adjustments to my pattern pieces and then cut into the Wonderland rayon by Rifle Paper Co! Holy hecccckkk, I love this dress.

These are the changes I made to the pattern:

  • scooped out about 1/2″ from each side of the V-neck (and copied this change to the facings)
  • removed 6″ of length from the skirt pieces and redrew the side seams, adding some extra fullness
  • cut two strips, 6″ x WOF, to be used for the ruffle at the bottom
  • sewed the strips together, pressed the ruffle in half (wrong sides together) and then gathered the long strip, fitting it to the same width as the skirt bottom
  • sleeve: removed 4 1/4″ in length, and slashed/spread to add 1/2″ to the bottom width
  • made the waist ties extra narrow

m7246_11

m7246_2

m7246_3

m7246_4

Here I am being instructed to show off the ruffles:

m7246_6

m7246_14

I’m really happy with how this dress fits and looks! I think the length is perfect, and all of the details are finished off super neatly. I might experiment with a different way to finish the center front neckline in the future – the facing worked fine, but I had to topstitch them down so they didn’t flip/peek out. Would just serging and turning the edge under 5/8″ be sufficient? I feel like it should be, I’ll probably give it a try next time.

You can kiiiind of tell, but the waist tie goes through a hole in the right side seam before wrapping around your bod. I’ve seen this detail in other patterns, but I’m glad it was included here too.

m7246_13

And this is what happens when I’m embarrassed and tired of taking photos on the street outside my house!

m7246_12

Whew! Okay I think that’s it. Let me know if you’ve tried this pattern, or if you have any other woven wrap dresses that you want to try! I gotta go cut out a pair of shorteralls now, bye!

m7246_10

rifle paper co // butterick 6052

rifle2

I’m so happy that I finally used the last of the Rifle Paper Co yardage I bought last summer! (Nevermind that I recently got some more in the mail…dang.)

I was saving this blue rayon for a dress I wanted to wear to a wedding in Hawaii last month. It was hard to motivate myself to sew a strappy, summery dress in the dead of winter, so I ended up waiting until the week before we left for our trip to finally get going. DUH. Self-imposed deadlines right before a trip – story of my life.

rifle7

The pattern is one of my favorites – Butterick 6052. I used it for the first time last summer (you can check that out heeere) but I made a couple of adjustments to this version. I removed more length from the straps, an extra 1/2″ bringing it to 1″ total, and used an easy gathered skirt  + pockets on the bottom half.

I think at this point people must be sick of the cold shoulder trend, but I will never not love these sleeves.

rifle4

rifle5

This fabric really is so lovely to sew. It’s a little bit more substantial than other rayon I’ve worked with, but that only makes it even more fluid and drapey. I used a light cotton lawn that I had in my stash for the lining, and it worked perfectly.

rifle6

rifle1

Here are a few photos from the wedding in Hawaii! We were celebrating our friends Aaron and Emily – it was so beautiful and so much fun. There was a passing rain shower during the ceremony (which is why we’re all wet), but it was perfectly sweet and goofy.

Processed with VSCO with f2 preset

Processed with VSCO with f2 preset

Processed with VSCO with f2 preset

Some of my best friends and a handmade dress! Nothing better than that.

ginger jeans + lark tee

IMG_9238

I’ve got two very-recent projects to share today! I made a lot of time to sew after work over the last two weeks, and it felt so good. Making time for myself to sew for an hour here and there is so essential to my mental health, it’s ridiculous. I can truly feel my body and brain buzzing when I don’t have that chance to sit down at my machine. I’m so grateful to have the space and tools to make things.

ANYWAYS. Last year I made my first pair of Ginger Jeans – and while I wear them all the time aaand love them, I’ve always wanted to make another pair that had a higher rise. Heather at Closet Case Patterns recently released the Mid-Rise Gingers as a standalone PDF, and instead of drafting it myself I lazily picked up the new pattern instead. I’m not even mad that the marketing ploy worked on me because they are the PERFECT rise and I didn’t have to use my brain.

IMG_9146

I made the same size as my first pair, size 8, which is exactly right for my bod. I removed 1″ of length at the knees, though I think I could do a bit more next time (maybe 1.5″?). And I left these a little longer than last time, so I could cuff the bottom if I wanted. Other than that, I didn’t make any real modifications. Though I did get a ~little~ fancy and stitched flat felled seams along the in-seam – I feel like that makes them “real” jeans now.

Just a quick note, this a black denim from Threadbare Fabrics and it’s lovely.

IMG_9178

My regular machine does a great job sewing through denim, but remembering how the topstitching thread did not work super well last year, I decided to try out this green beaut. Holy HECK using this lil’ guy was SO MUCH FUN. An added benefit was also not having to switch out the thread every few minutes to topstitch (instead, just switching machines), which felt luxurious. I found this Singer at the Resource Exchange, an amazing store right by my office, a few months ago and couldn’t just leave it there!

green singer

Here’s a look at some of the topstitching! I prefer non-contrast thread for jeans, so it’s not super obvious, but man. Love.

IMG_9237

I’m going to share some photos of my booty now because it’s probably my favorite part of these jeans. I raised the pocket pieces 3/4″ higher than the pattern suggests, and they’re perfect (I think? at least).

IMG_9141

IMG_9191

Here I am contemplating my crotch curve… I’m just not sure about it. I know there are always going to be some wrinkles, but I’m wondering if I need to draw in a shallower curve? I don’t think the crotch length is too long or too short, which leads me to the “flat pubis adjustment” from Heather’s blog post about fitting adjustments. I do love this pair, but I’m thinking about for next time. Feel freeeee to let me know if you have any input!

IMG_9134

I also made my first Lark Tee! The pattern is by Grainline Studio, and I didn’t really feel like I needed it until recently. I love my Lou Box Top shirts (see here for one, though I’ve made about 4 or 5), but I needed a true t-shirt in my wardrobe. I sized up so it would be a bit looser, and I’m feelin’ this fit. Instead of hemming the sleeves, I rolled them up and tacked them into place.

IMG_9171

I used a Dear Stella knit, which is a great match for this pattern, and it’s so fun seeing this Scallop Dot print in a new substrate. The color is spot on, too. Such a great everyday outfit, wahoooo!

Okay bye!

IMG_9158

m7351 shirtdress

img_1464

There’s something about shirtdresses that I haven’t been able to get out of my head. I’ve made the Alder Shirtdress and McCall’s 6696 in the past, but neither of them were quite what I was envisioning. I’ve seen so many good versions out in the wild, but nothing I made fit me the way the way I wanted.

(This is an inspiration dress from Anthro that I pinned SO LONG AGO. Maybe three years ago, even.)

inspo.jpg

Last year, McCall’s released m7351 and I used it for a bunch of sleeveless button ups (see here, and here). The fit through the bust is ace and I love the size of the collar. I’m not a fan of every variation offered in the pattern, but the bodice and sleeves looked like a good match for my inspo image above.

One weekend in the fall I found a length of a loosely-woven plaid  in my stash (from my old local shop, PS Fabrics) and the timing felt right…

img_1438

Besides using my own gathered skirt and doing a 1/2″ square shoulder adjustment, I didn’t make any adjustments to the pattern. At this point I’ve made so many button ups that plaid matching shouldn’t be so exciting, but dang I’m pleased with how this turned out. Figuring out cutting the placket is such a satisfying puzzle.

img_1468

I don’t actually love the contrast inner collar, but it’s not super noticeable. And the buttons I picked up from Fleishman’s! They were supposed to be for Dan’s chambray shirt (which is still in a pile in my sewing room, oops) but I ‘borrowed’ them. It felt right!

Here’s a lil’ side view.

img_1462

I’m not sure I pull this off as well as the Anthro model does, but I do really like this! I think next I need to find the perfect loose-fitting shirtdress pattern. Maybe with a dropped shoulder sleeve.  I’m deciding between that, or another pair of woven Hudson pants, for the Euclid linen I’m holding onto…

img_1454

hudson pants + hemlock tee

hudson pants IG.jpg

I’ve been dreaming about Dear Stella knits for a loooong time (in case you’re new here, I worked at DS for five years (!) but this past August I moved to Philly). Their first run of knits is releasing next month, and I’m so excited for everyone to start sewing with them!

One of my favorites from the selection of knits is definitely Wee Gallery’s Grid print. I knew the first thing I’d make would be a pair of Hudson Pants (pattern by True Bias) in the black colorway.

IMG_1539.JPG

I love these. I have a pair in black ponte (which are also the best) but it’s nice to have a pair that are not quite as heavy. The fabric is stretchy and soft, keeps its shape and doesn’t bag out. I wouldn’t use these knits for anything super drapey, but they’re great for most other thingz. I have more plans for a dress, leggings, a Linden sweatshirt, a long sleeve shirt… As always, my eyes are bigger than my stomach (that’s a saying, right?) and my to-sew list is admittedly out of control.

Anyways, I sewed these up with no modifications other than skipping the drawstring. I could probably stand to take some length out at the knee (maybe 1/2″?) but otherwise these have a great fit. I love the pockets and the ankle cuffs! Please note: these pants are extremely comfortable.

IMG_1545.JPG

On top is a well-worn Archer Button Up (pattern by Grainline Studio). I’ve semi-recently learned that I need to make a forward shoulder adjustment to my button ups, so you can see there’s a little bit of pulling since that adjustment hasn’t been done here. I think I made this a little over a year ago, using a Robert Kaufman chambray, and it’s definitely a staple in my closet.

I alsoooo made a Hemlock Tee (free pattern by Grainline Studio when you sign up for their newsletter) in the white colorway.

IMG_1571.JPG

I narrowed the sleeves by 1″ and added cuffs. I think I also removed about an inch from the side seams. Not much else to report, besides that I think this print is just really lovely. And I’m wearing my Ginger Jeans here, which still get a lot of wear! I’m planning a new pair too – I got some stretch black denim in the mail a little bit ago…

IMG_1579.JPG

Whoo! That’s it for tonight. I’m really excited about these knits and can’t wait to see what everyone else makes with them! You can check out the other prints here, here and here. Byeeeeee.

IMG_1568.JPG

hemlock tee + lakeside pj shorts

After a teeny break while I figured out how to motivate myself to sew when it’s cold in my house, I’m happily back on the wagon and making all. the. things.

First up is this comfy cozy outfit, both of which are patterns by Grainline Studio.

IMG_1480.JPG

Up top is the Hemlock Tee, a free pattern when you sign up for the Grainline newsletter. A boxy long-sleeve with drop shoulders, it’s a super easy sew. I’ve had this pattern printed for a long time, but I made this for the first time last month and this is my second version. I shortened the length by ~3″, narrowed the sleeves by 1″ total, and added cuffs. I also added a split hem!

IMG_1482.JPG

The fabric is a soft sweater knit I picked up from Fleishman Fabrics, my local shop that I stalk on the weekends (since it’s closed by the time I get home from work). Until semi-recently I didn’t really think about sewing sweaters, and in the last month I made this and a Driftless Cardigan, both of which are getting a lot wear! Just tryna get by, one comfy outfit at a time.

IMG_1516.JPG

I also made these cutie pj shorts! They’re part of the Lakeside Pajama pattern, also by Grainline. I’ve only made the bottoms so far (in the summer I made this pair, which I wore all the time) and I reaaaally love the bias binding along the hem.

Also DUH I am obsessed with this fabric. It’s the Moon Phase print from the Moon Garden collection by Rae Ritchie for Dear Stella, and in case you’re wondering YES I do happen to love everything she creates. Rae’s collections are on cotton shirting which is lovely for quilting and just as lovely for garments (particularly ones that don’t require too much drape). It’s a bit finer than quilting cotton and soft!

IMG_1505.JPG

I’m trying to remember any particular sewing details with these pajama shorts but I’m pretty sure I just made them as-is, with no alterations. I did go up a few sizes because I’d noticed other versions out in the interwebz looking a little fitted? I wanted these guys to be loose and, you guessed it, comfy.

That’s all I’ve got for tonight, but I will be back soon with another new garment! Until then, here’s a photo where I’m pretending to be sleepy, which is really not hard for me to do since it’s a state I’m in quite frequently. Thanks, as always, to my Artistic Director for his guidance during our photo shoot.

IMG_1486.JPG